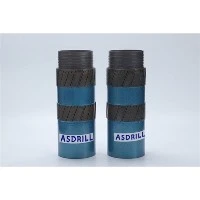
Hey there! As a supplier of Hydraulic Surface Coring Rigs, I know how crucial it is to have these machines calibrated properly. Calibration ensures that your rig is working at its best, giving you accurate results and preventing any unnecessary wear and tear. In this blog, I'll walk you through the steps of calibrating a Hydraulic Surface Coring Rig.
Why Calibration Matters
Before we dive into the calibration process, let's talk about why it's so important. A well - calibrated Hydraulic Surface Coring Rig provides reliable and consistent data. Whether you're doing geological surveys, environmental studies, or construction site investigations, accurate core samples are essential. If the rig isn't calibrated correctly, you might end up with inaccurate depth measurements, poor core quality, or even damage to the equipment.
Pre - Calibration Checks
First things first, you need to do a few pre - calibration checks. Start by inspecting the rig for any visible damage. Check the hydraulic hoses for leaks, make sure the drill bits are in good condition, and examine the power unit. Any issues with these components can affect the calibration process.
Also, clean the rig thoroughly. Dirt and debris can interfere with the sensors and other precision parts. Use a high - pressure cleaner to remove any dirt, mud, or dust from the rig.
Step 1: Leveling the Rig
The first step in calibration is to level the Hydraulic Surface Core Drill Rig. A level rig is essential for accurate drilling. You can use a spirit level to check the horizontal and vertical alignment. Adjust the leveling jacks until the rig is perfectly level. This might take a bit of time and patience, but it's worth it. If the rig isn't level, the drill can deviate from the intended path, leading to inaccurate core samples.
Step 2: Checking the Hydraulic System
The hydraulic system is the heart of the rig. It controls the movement of the drill, the feed rate, and other important functions. Start by checking the hydraulic fluid level. Low fluid levels can cause the system to malfunction. Make sure the fluid is clean and free of contaminants.


Next, check the hydraulic pressure. Use a pressure gauge to measure the pressure in different parts of the system. Compare the readings with the manufacturer's specifications. If the pressure is too high or too low, you'll need to adjust the pressure relief valves.
Step 3: Calibrating the Depth Measuring System
Accurate depth measurement is crucial for getting reliable core samples. Most Hydraulic Surface Coring Rigs have a depth measuring system that uses sensors. To calibrate this system, you'll need a reference point. This could be a known depth marker on the drill rod or a fixed point on the rig itself.
Start by zeroing the depth measuring system. Then, lower the drill to a known depth and compare the reading on the depth gauge with the actual depth. If there's a difference, you'll need to adjust the calibration settings on the depth measuring system. This might involve using a calibration tool or adjusting the sensor settings.
Step 4: Testing the Drill Bit and Feed Rate
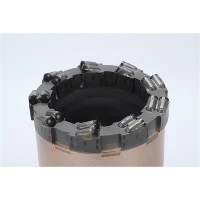
The drill bit and feed rate are important factors in getting good core samples. First, check the drill bit for wear and tear. A dull or damaged drill bit can cause poor core quality. Replace the drill bit if necessary.
Next, test the feed rate. The feed rate is the speed at which the drill bit advances into the ground. You can adjust the feed rate using the hydraulic controls on the rig. Start with a slow feed rate and gradually increase it until you find the optimal rate for the type of soil or rock you're drilling through.
Step 5: Verifying the Alignment
After all the adjustments, it's important to verify the alignment of the drill. Use a plumb line or a laser alignment tool to check if the drill is straight. Any misalignment can cause the drill to veer off course, resulting in inaccurate core samples. Make any necessary adjustments to ensure the drill is perfectly aligned.
Step 6: Conducting a Test Drill
Once you've completed all the calibration steps, it's time to conduct a test drill. Choose a test site that's representative of the actual drilling conditions. Lower the drill and start the test. Monitor the depth, core quality, and other parameters.
Check the core samples for any signs of damage or poor quality. If the core samples are not up to par, you might need to go back and make further adjustments to the calibration.
Step 7: Documenting the Calibration
It's important to document the calibration process. Keep a record of all the adjustments you made, the test results, and the date of calibration. This documentation will be useful for future reference and for demonstrating compliance with industry standards.
Conclusion
Calibrating a Hydraulic Surface Core Drilling Rig is a complex but essential process. By following these steps, you can ensure that your rig is working at its best, providing accurate and reliable core samples.
If you're in the market for a high - quality Hydraulic Surface Coring Rig or need more information on calibration and maintenance, don't hesitate to reach out. We're here to help you get the most out of your equipment.